Movie linked below:
Linear Workflow, I love you!
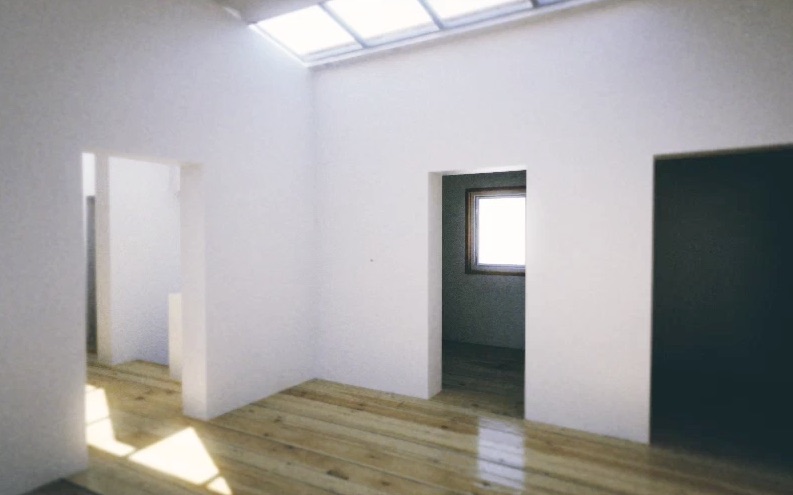
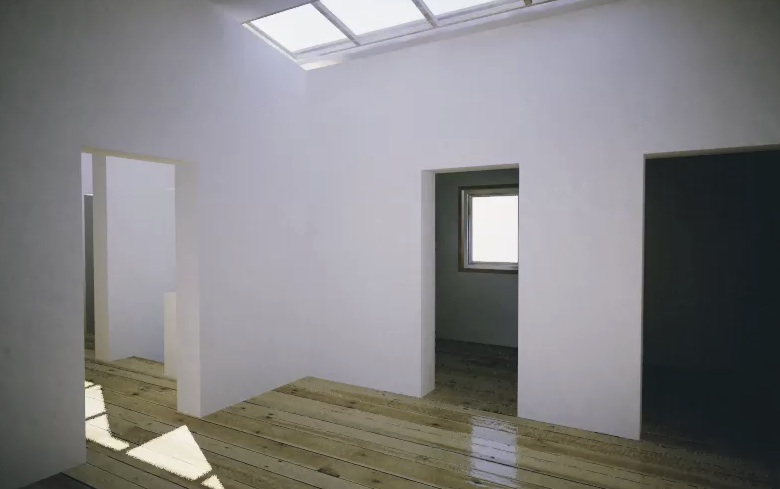
Before and After, difference is done in AE Post with use of color profile conversion to simulate film A realistic form of tonemapping in a way.
Details on Linear Workflow, general 32bit color ness and jazz to be found at the following link:
Good site full of info on Cinematography, Color Correction, 32bit Linear Workflow etc etc:
Link: prolost.blogspot.com
And
For tone-mapping in AE to make it look film like:
Link: fnordware.blogspot.com --- hdr-tone-mapping-using-film-profiles
I'm going for the realistic/film look with hand held camera, I want to have some really nice fluctuating DOF and motionblur along with overly hazy bloom with a scratched/drity lens effect.
Doing the DOF could be a nightmare and I don't think I'll bother, Motion blur would be nice to do in vray but I'll probably end up doing it in post with ReelSmart MotionBlur? or something.. hopefully I can get a nice enough effect.
I've created a very rough example of this here, so check the link below for the movie:
It needs a lot of work, for a start the averaging code work linearly, but our eyes see light exponentially/logarithmically. So the perceptual average brightness is not the same as the calculated, which skews it a bit.
But It's a good start! And I already have a few ideas how to improve it greatly.
Ok, new day, I've found a nice model of a House, fixed it up a little, boarded some windows up all in the name of testing and fine tuning my auto-exposure expression.
I've rendered it at super super super low quality and It's takingaround 20-30 seconds per frame. Below is one such frame after some fine post work by AE:
That looks strikingly good considering all I did was put a physical sun/sky on and hit render. The realism really is down to the color correction, it looked kinda crap before I did the post work in AE.
Should look even better if I can find a way to batch Maxwell Simulens it.
Well my auto-exposure expression is pretty nice, and it helps a lot, but It's kinda shit too. It's going to take a huge leap of math to make it work properly and not just based on guess work.
Working like this is HARD, you have to be so careful with color profile and linear light, everyone and their dog wants to fiddle with the HDR before you get to see it, and to make matters worse, when I work in what I believe is the correct linear color space in AE, it... looks fantastic in the realtime viewport, but If I hit render.. I get a different result!?!?!?
Clearly even Adobe have a hard time with this color stuff.... fantastic...
--
Ok I've figured out how to do this now in theory, I just realized a checkbox on the exposure effect alter It's behavior, bringing it in line with what i'd expect whereby an exposure of 2 versus 1 results in doubling the average brightness of the image. Now I just have to figure out the math to work that out in reverse... I know it will involve log() in someway.... I really can't wrap my head around the math... *hunts for math geeks AGAIN*
Simulating camera/eye optical effects and response
lens flares
depth of field
motion blur
lens effects/diffraction
bokeh
chromatic aberration
tonemapping/filmresponse
-- Examples --
For more detail on a project of mine that involved it you can go here:
Link: helios.mine.nu --- Lens Simulation
I also did a bunch of research into simulating auto-exposure
Fresnel Lens Simulated in Maxwell:
Link: www.digitalartform.com --- fresnel_lens_-
Fryrender
Zipper.deviantart.com
Light splitting, chromatic aberration, rainbows. = pretty!
Frindging
Link: www.dofpro.com
Link: www.dofpro.com
Link: www.dofpro.com
Link: www.dofpro.com
Link: www.missouriskies.org --- february_rainbow_2006
Some nice real world lens flares:
Link: www.flickr.com --- 1026048408
Link: flickr.com --- 288235379
-- Tools --
Make your own LensFlare by hand in AfterEffects with expressions:
Link: library.creativecow.net --- lens_flare
Other 2D solutions like Knoll Light Factory:
Link: www.redgiantsoftware.com --- knoll-light-factory-pro
Link: www.frischluft.com
Frischluft : Flair - BoxBlur with Aberrations:
Frischluft Lenscare: Simulated DOF:
Frischluft Lenscare:
Frischluft Lenscare: Distortion around edge:
Frischluft - Fresh Curves
Looks powerful, hopefully It's 32bit as I've been looking a for 32bit powerful curves editor!
Frischluft - ZbornToy
Link: www.maxwellrender.com
With Maxwell Renders SimuLens tool you can (on any HDR image you feed it) produce a very realistic lens simulation, simulating the aperture and any dirt/obstruction on the lens:
The above was rendered in Vray by me, then color treated and given to Maxwell for the lens effect
You cannot (as far as I see) do your typical cheesy lens flare with the several concentric rings
Some tests of throwing it some brush strokes done in photoshop in 32bit:
Not quite realistic, but adds a nice touch
Ok so I take several photos at different shutter speeds and fstops, it seems like when you open the RAW file in Photomatrix Pro it exposes/view all of the images at some set value which is correct!!!
So for example these two:
Look the same, but they were taken are very different exposure settings, this is revealed by reducing the exposure on thei mage in post revealing that the one imagecaptured details in the lighter areas where the other didnt:
Same two images but with the exposure reduced in post. This is how image programs should behave!
Now for example lets open the same 2 images in photoshop and you will see my issue:
The one appears much brighter as photoshop views then relatively not absolutely. Which makes sense for the majority of things.
The problem is when assembling several exposures into 1 HDR image, at some genius point it shifts all the image brightness values to a centre point, an image preview white point or something, effectively turning the values into relative opposed to absolute.
Relative is nice for viewing images as you don't have to worry about exposing it properly in the viewer, however it makes HDR images USELESS! for rendering/image based lighting. It should be down to the viewer/reader to expose the image correctly but instead it appears to physically move light values around in order to bring it to a centre point for viewing.
I'm still not sure what's going on, I'm now getting the feeling that the image data recorded is kept accurate in linear pixel values and It's just the viewer converting it... It's hard to tell as I have found NO software that lets you sample a pixel and tell you It's real inear luminance value, they all tell you the relative value I think.
What I want to be able to do is take a 3D render and take a photograph and sample the actual surface luminance and check they are correct, check the sun is the right luminance, check the wall is the right luminance value for the size of room and the provided lighting.
I've been racking my brain lately over human eye-sight optics. The natural response curve of the human eye and how I can simulate that on a 3D render. Including bloom effects and how the eye adapts to changes in brightness and depth of field auto-focus.
I'm working now with a realistic type of scene, the end goal will be to transition the 'realism' knowledge and tools to not so ordinary subject matter and retain the same level of realism with rather more abstract items.
I believe you should always render to a linear color space, no tone mapping. Then take the 32bit output and simulate the tone/color-mapping in post using something like AfterEffects. This then gives you the ability to detect over bright areas and 'bloom' them and realistically simulate film/camera/eye response to color and brightness. So simulate the camera in post, not in render (if possible)
This isn't great for things like DOF which really need to be done as part of the ray tracing till we can save out volumetric images from renders. But hopefully enough information exists to simulate the other effects more interactively.
I was wondering why a lot of my renders didn't seem to be HDR, or looked 'weird' then I figured out it was because I was relying on Vrays tone-mapping to adjust my image to exposure all areas evenly, which achieves a weird bland but evenly exposed image.
All of this makes it increasingly important to have accurate setup including scale of scene, accurate sun brightness and area light brightness. And this can be hard if you use any HDR's to light the scene as they are usually relatively calibrated and are not in anyway accurately emitted the correct brightness of light.
I'm also working on a way to have an animation auto-expose like a camera or the human eye to changes in brightness.
Right now for animation the only way I can see of changing the exposure over time is render the whole animation once out to HDR, then have another 3D program import each frame of that animation and displays on a camera facing plane, or hangs it in front of the camera... then with interactive render-region, key frame the camera exposure settings so the image is exposed correctly. Then hide the plane, and re-render the movie again with those key-framed exposure settings thus simulating the propper DOF and motion blur that goes with it too. But I want REAL subtle and fast exposure changes and no way you could key frame that, would be insanely painful.
As a side note, I see 3ds Max Design isto include Exposure technology for simulating and analyzing sun, sky, and artificial lighting to assist with LEED 8.1 certification.
UPDATE : Ok, I should be able to do this within AfterEffects now, I've found it can detect average brightness, but the logarithmic math and such are beyond me so I'm waiting on some serious math nerds to help me out with a working formula
:-)
I've found Maxwell simulates a camera lens really well, and you can load any HDR image into it and have it work It's magic. The blurring is a bit extreme in the following images, think of it as a very very dirty camera lens.
Here is a before and after:
The above is with some color work in AE, simulating some film color profiles. Simulating the response curve of film greatly improves the image, you get more interest contrasts and color shifts, and in general just looks nicer and more photographs removes the highly linear and boring CG look that's so typical otherwise.
Link: fnordware.blogspot.com --- hdr-tone-mapping-using-film-profiles
Details on Linear Workflow, general 32bit color ness and jazz to be found at the following link:
Good site full of info on Cinematography, Color Correction, 32bit Linear Workflow etc etc:
Link: prolost.blogspot.com
Odd super bright pixels appeared in my render and resulted in this blow out... cool though, no reason you couldn't use this effect on images drawn in Photoshop from scratch.
ooo.. I like it.. very much
Let the busted camera effects commence!:
Looks almost real
:-)
like a scale model. Burns done with stock footage of film burns thanks to Artbeats Film Clutter 1Not conscious of it, as I don't know anything about cinematography, but I have apparently been trying to simulate super-8 film. I wanted a hand held look, and some more interesting color and exposures, a more textural... rich, warm.. romantic? look to it, which I suppose super-8 achieves rather naturally. I'm not interested in recreating reality exactly, I want a better reality, an artistic reality. Technology (digital cameras) may be getting closer to capturing reality but, is that a good thing, well yes as long as you can then go and post produce it to be more interesting.
I get the feeling that capturing friends and family on a modern consumer camera is more akin to spying or surveillance footage, unflattering, cold. It's kinda funny really, using a computer to simulate what is essentially bad technology.
Hah, just found someone saying the same thing "It's somewhat ironic that now we have the ability to rid our screens of the scratches, lines and bits of debris that find It's way onto film, we choose to put them back in digitally".."Similarly, just as lens manufacturers have worked hard over years developing special coatings to eliminate artifacts, those involved in CG can't get enough of these lens effects, though considered undesirable in traditional photography, their popularity in CG lies in the fact that they are visual hooks that we associate with reality, or at least a photographed version of reality. They are also fairly useful when it comes to hiding something that's not rendering quite right too"
I want that same warmth and nice exposure with all the beautiful blooms and light effects that go with it, but no so much the dirt, blur, shake and low frame rate. I'm going to have an experiment.
Just looking at the whole area of things really, light can do some wonderful things and digital technology isn't quite there yet in terms of recreating it, the way light splits, lens flares, aberrations, rainbows, we as human beings find them beautiful for whatever reason.
Also things like simulating a huge depth of field and motionblur just seems to make images more natural and attractive, supposedly because the human eye has such a large depth of field but we normally don't notice it as whatever we are looking directly at, is always in sharp focus.
Looking at recreating the look of viewing thru someones eyes or via a hand held camera, and found this tool for C4D:
Link: www.c4d-jack.de --- buy
Also of note is Cinemas Architectural Bundle that includes some walkthru tools that can be recorded allowing you to freely walk around your model with the keyboard and mouse just like a FPS game.
Theres also CSTools MoCam which is free!
Link: circlesofdelusion.blogspot.com --- cstools-faq
Real Super 8 footage:
Link: www.youtube.com


